
Peanut Butter Cups Recipe
This post may contain affiliate links. If you make a purchase through links on this site, I may earn a commission.
Read my Privacy Policy.
These peanut butter cups are better than store-bought!
If you love Reese’s Peanut Butter Cups, you’ll love these homemade peanut butter cups too.
Eating healthy doesn’t have to mean that you give up everything you’ve ever liked in favor of cardboard and sawdust on your dinner plate. In fact, it’s quite the opposite.
You can still enjoy your favorites. Favorites such as peanut butter cups.
Yes, chocolate and peanut butter were meant to go together. But it doesn’t have to be unhealthy. Things that taste good CAN actually be healthy too! <gasp!>
Why Make Homemade Peanut Butter Cups?
That’s easy!
- The taste and quality are leaps and bounds better with proper ingredients.
- You control what’s in them! There are no questionable chemicals or preservatives added. It’s just all-natural, real-food ingredients.
- You can get creative! Try white chocolate, dark chocolate, bittersweet or semi-sweet, OR, to keep it truly healthy, purchase baking chocolate (absolutely no sugar added – totally unsweetened) or use a cocoa powder like I did, and add your own natural sweeteners as I’ve done here. I promise you’ll never go back to store-bought!
- Portion control. Yep, you can make these tiny so you have portion control. That’s why I make these in a mini muffin pan. You can always eat more of them if you want a larger helping. But this gives you a tiny treat when you need it most.
How To Make Peanut Butter Cups
If you’ve ever made this sort of homemade candy before, where you’re working with melted chocolate, you know it can be a hassle to keep the chocolate warm with a microwave long enough to get through making all your candy.
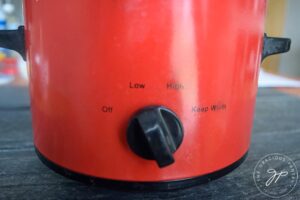
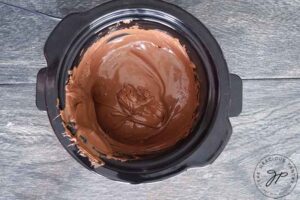
A simple hack is to melt your chocolate in a slow cooker. A smaller-sized slow cooker usually works best, but work with what you’ve got.
On low heat, the slow cooker keeps your chocolate warm for as long as you need (within reason – it will burn eventually). This recipe reflects the use of a slow cooker. But I’ll give instructions for the stovetop as well.
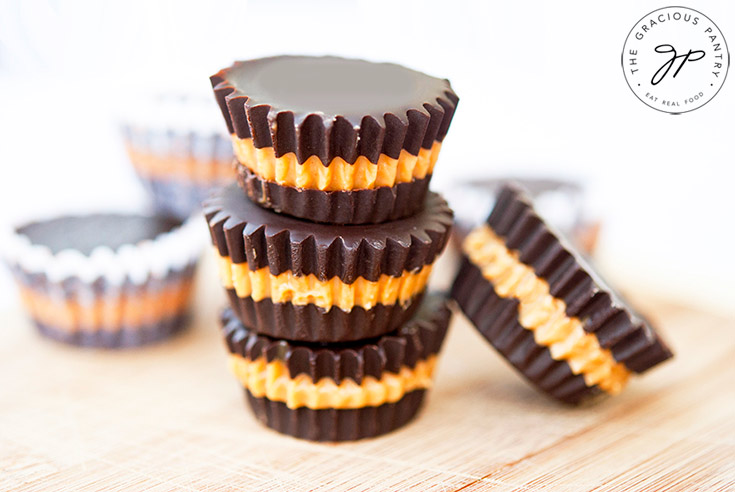
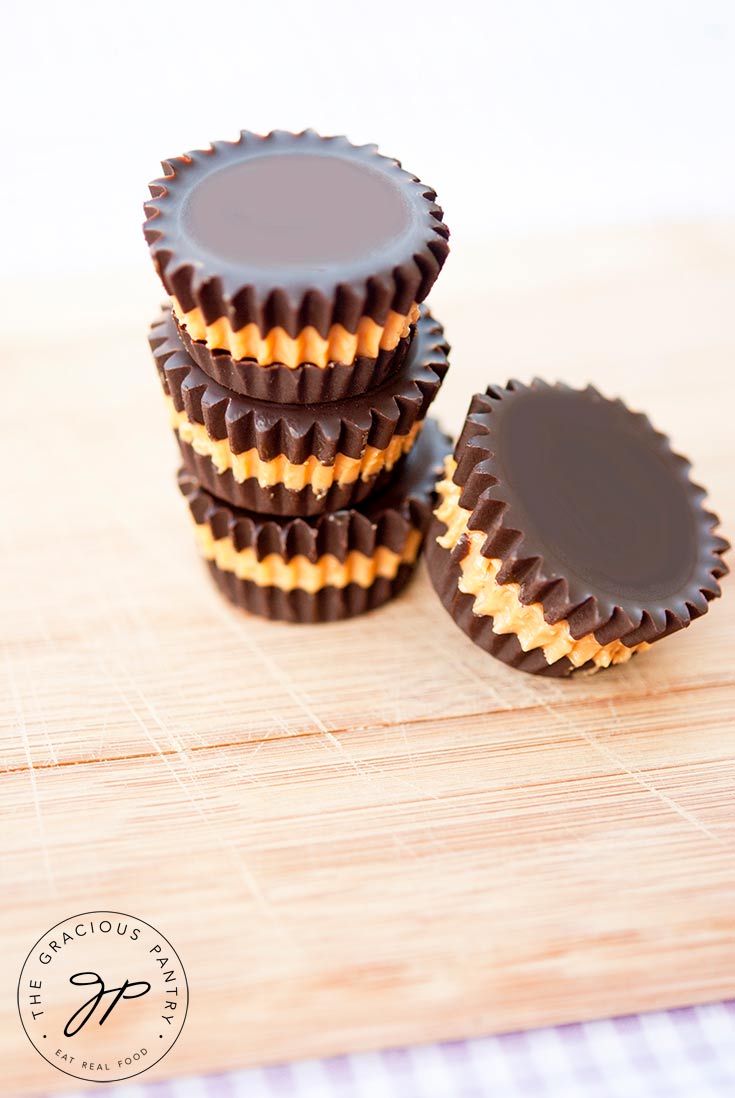
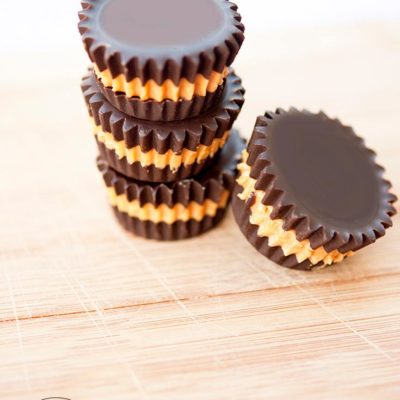
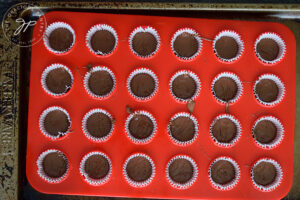
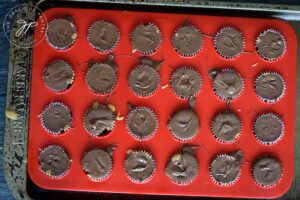
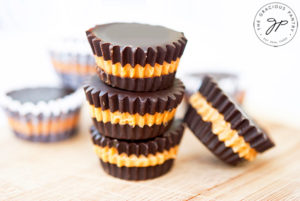
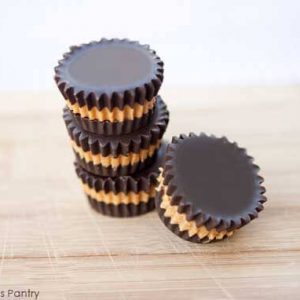
Once your chocolate is melted and other ingredients have been added, you’ll spoon enough chocolate into the paper-lined mini muffin pan wells to fill up a 1/3 of each well. Then you’ll stick that in the freezer to chill and harden. Once hard, you can spoon on the peanut butter another 1/3 of the way and then spoon the rest of the chocolate over that. Return them to the freezer until hardened, pop them out, and keep them in a food-safe container in the freezer until ready to eat.
FAQs
How To Melt Chocolate
Should you choose to use chocolate instead of cocoa powder (that recipe is below the first recipe below), you have three options here.
Melting Chocolate In A Slow Cooker
As I mentioned above, one of the easiest, no-fuss options for melting chocolate is by using a slow cooker.
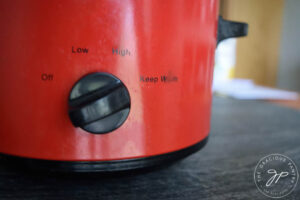
NEVER use a lid when you melt chocolate in a slow cooker. This will create moisture (slow cookers cook with moist heat), which will make your chocolate seize up (that dry, clumpy mess when you overheat or expose the chocolate to moisture). So avoid using a lid at all costs. Simply put the chocolate in, turn the heat to low, and stir occasionally until your chocolate is melted.
If you have a warm setting on your slow cooker, turn it to that setting once the chocolate is melted.
If you do not have a warm setting, you’ll need to work quickly to avoid the chocolate becoming a seized mess.
If you do overheat your chocolate, instructions for fixing it are in the YouTube video below.
Melting Chocolate In A Double Boiler
This is the “proper” way to melt chocolate. You’ll need a double boiler pot or a pot with a heat-safe bowl that will sit safely inside the pot while resting on the edge.
You do not want to use a bowl small enough to sit completely inside the pot. The bowl must rest on the edges of the pot so that it is suspended over the water.
There needs to be a seal between the pot and the edge of the bowl so that steam does not damage your chocolate.
- Bring your water to a boil.
- Reduce to a strong simmer.
- Put the chocolate in the bowl.
- Set the bowl over the pot.
- Stir frequently until the chocolate is melted.
- Remove the bowl from the pot, wipe the bottom of the bowl, and set it on a heat-safe surface.
How To Melt Chocolate In A Microwave
Where convenience is concerned, melting chocolate in a microwave is second only to the slow cooker.
- Put your chocolate in a glass, microwave-safe bowl.
- Place the bowl in the microwave and cook for 1 minute.
- Stir the chocolate.
- Return the bowl to the microwave and cook for 30 seconds.
- Remove the bowl from the microwave and stir.
- Repeat the 30-second intervals with stirring after each interval until your chocolate is fully melted.
- Stir well each time to help the chocolate melt from the heat of what’s already melted instead of trying just to microwave it into submission.
- Use a pot holder because the bowl will get very hot!
Making Peanut Butter Cups With Cocoa Powder
Yes, you can make peanut butter cups with cocoa powder! In fact, that is the original version of my two recipes below. You don’t have to use actual chocolate bars or chips. The powder will work just fine, provided you use virgin coconut oil to help things harden as they cool.
The upside of using cocoa powder is that you don’t have to worry about your chocolate seizing up. You just warm and whisk everything together and build your peanut butter cups. Easy!
The Peanut Butter
You can’t have peanut butter cups without the peanut butter. But the kind of peanut butter you use is important.
- Your favorite peanut butter is always the best choice for flavor.
- All-natural peanut butter won’t have any added sugar.
- You’ll want creamy peanut butter for this.
- Use room-temperature peanut butter. It’s far easier to spoon into those little cups.
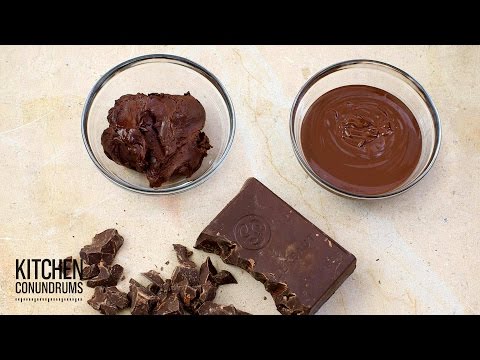
How To Fix Seized Chocolate
If you ended up with a dried, clumpy chocolate mess instead of a nice, silky, melted chocolate, check out this YouTube video for how to fix that.
More Healthy Candy Recipes
Peanut Butter Cups Recipe Card (Using Chocolate)

The recipe for using cocoa powder is below.
Peanut Butter Cups – From Regular Chocolate
CLICK TO WATCH THIS RECIPE IN ACTION!
Equipment
- Mini muffin pan
- Mini Muffin Liners/Papers
Ingredients
- 32 oz. chocolate chips I used Lily's
- ½ cup peanut butter ( no sugar added )
Instructions
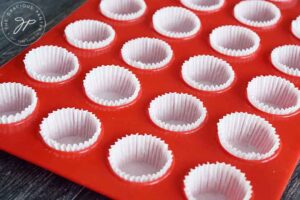
- Line your mini muffin pan with mini muffin papers.

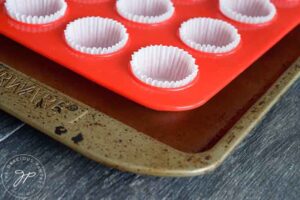
- If your muffin pan is silicone, set it on a cookie sheet for stability.
- Set your slow cooker to its low setting.
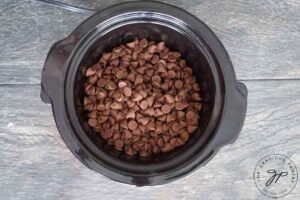
- Pour the chocolate chips into the slow cooker.
- Stir the chips frequently so that the already melted parts can help melt the rest of the chips. This process can take about 20-30 minutes, depending on the chocolate chips you use.
- The chocolate should be smooth, silky and easy to to stir when it's finished melting.
- Once properly melted, turn your slow cooker to it's warm setting.
- Fill the muffin papers 1/3 of the way with chocolate, then freeze for 15 minutes.
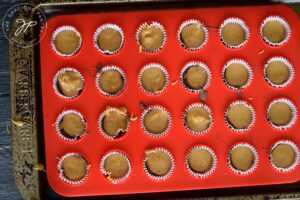
- Add peanut butter another 1/3 of the way over the frozen chocolate.
- Over this, pour on the rest of the chocolate to top them off. Then return to the freezer for at least 2 hours.
- Pop out, peel off the papers and enjoy!


Notes
Nutrition
Peanut Butter cups Recipe Card (Using Cocoa Powder
Peanut Butter Cups
Equipment
- Mini muffin pan
Ingredients
- ¾ cup coconut oil
- ½ cup unsweetened cocoa powder
- ½ cup honey
- 2 tsp. pure vanilla extract
- 1 (16 oz.) jar clean peanut butter, smooth works best
Instructions
- In a medium pot, combine all ingredients except the peanut butter.
- Whisk thoroughly over low heat until the chocolate is smooth.
- Using either an oiled silicone mini muffin pan, OR foil cupcake papers in a regular muffin pan, fill the wells 1/3 of the way up with chocolate. Keep the chocolate warmed over low heat if possible or on the warm setting in your slow cooker.
- Freeze these for 15 minutes.
- Remove them from freezer and add another 1/3 using peanut butter.
- Freeze for 15 minutes.
- Remove them from freezer and add the last 1/3 with more chocolate.
- Freeze for at least 2 hours.
- Store in freezer. These get melty pretty quickly, so if you want to serve them but don’t want them frozen, put them in the fridge for about 20 minutes, then serve.
- Note: These are very good straight out of the freezer.
- If you prefer to use a slow cooker, simply melt the chocolate in a small slow cooker and keep the temp low or even on the warm setting if you have one. The chocolate will keep well during the intermittent freezings.
Notes
Nutrition
Recipe from the Gracious Pantry® archives, originally posted 3/14/11.
Yummy! Do you have to use dates? Hubby isn’t a fan. Is there an alternative?
OMG! I can’t wait to try these!!! Thank you for sharing! You make clean eating more enjoyable!!!
Karin – Thanks! I hope you enjoy them! I’ll be making these for Easter to put in Mini Chef’s basket. He’ll be so happy!
Hi Lora,
You don’t have to use dates but you don’t see them, taste them or have any idea that they are in the recipe. Peanut butter itself tends to be a bit dry (which works perfectly in the recipe) but the dates give it a bit of moisture without making it watery. They are what give it the ‘creamy’ texture that you have in the original recipe without it being running. I actually made them both ways (with dates and without) while I was experimenting with texture and my taste tester (my hubby – who doesn’t like dates) preferred the recipe with the dates.
~Sarah (thejoyofcleaneating.com)
for nut allergies….would soybutter be ok?
Thanks for some new ideas:!
Helen – Thanks! It doesn’t look like the chocolate she uses is clean, but that’s easily substituted. Nice to have a different method.
I couldn’t agree with you more healthy food is definetly just as tasty as non-healthy food!
Marie – Yes it is! In fact, it’s often better!
Yumm! These look so great. I love the idea of blending the pb and dates to get the thick Reese’s consistency. You are a genius!
Kelsey – Thanks! But I can’t take credit for this. It was a guest post from The Joy Of Clean Eating. Genius is right!
These look wonderful! Great idea adding the dates to sweeten them.Definately a must try!
Amy – Glad you like it!
hey there Tif!
Thanks for paying it forward and posting this!
I need to try it after I am off of my sugar / sweet fast…
btw, every time I try and print the recipes – it shows up blank & then the link is broken… any ideas? thanks!
~d
Ghalya – Hmmm. Thanks for letting me know. Let me look into it.
I believe you made a change to the printing? thanks a bunch! I printed it out – Great success!
After the sugar challenge – I plan to make these……… 🙂
~deirdra
Ghalya – Yep! Glad it’s all working now. Enjoy!
I like this idea much better than the old powdered suger filling recipe thanks! I will be making these soon
Trude – I never knew there was such a method. But then, I’ve never tried to make these before either. So that takes care of that! I’ll be making these for the first time for Easter. They are going into Mini Chef’s basket. Will probably have to also make some for the hubby so that the Easter Bunny has some left to deliver!
Thanks for sharing this recipe! I went out last weekend to buy the molds and tried this recipe for the first time. Absolutely yummy!!!
Robin – Fabulous!!! I’m so happy you enjoyed it!
I want to try these! Any ideas how to clean the rest of this recipe up? http://www.food.com/recipe/peanut-butter-cup-cookies-tarts-113299
I’m the christmas cookie baker and am going to experiment to try to make some of my favorites healthier. Thanks!
Vickie – I might be able to come up with something, yes!
First off, I absolutely love your blog, and all that you share with us, so thank you so much for helping the rest of us “clean-up” our Food. I had a question about the chocolate. I haven’t been able to find grain-sweetened chocolate chips lately. Do you have a recommendation if i started off with 100% cacao bakers chocolate and sweetened with honey/agave? not sure what the right ratio might be.
Thanks so much!
Your best bet is to use honey to taste, and also mix in some coconut oil. The oil will help the chocolate stay smooth when you mix in the honey as well as help it solidify in the fridge.
Do you have a calorie count on these if you follow the recipe as you have laid out?
I tried making these tonight and they are amazing! I used stevia sweetened dark chocolate because I couldn’t find the grain sweetened. I will be making more for Christmas gifts this year.
Heidi – I’m so glad you enjoyed them!
Recipe looks yummy!! I don’t see dates listed in the recipe so how do I add those in and what size jar peanut butter?
Cathy – This recipe was recently update. There are no dates in it now.
Dates? I don’t see dates in the above recipe what are you and Laura talking about am I missing part of the recipe? Sounds yummy though. Looking forward to giving it a try.
Denise – The recipe was recently changed. It no longer contains dates.
These were so good! YOU ROCK!
Dawnetta – Fantastic!!! 🙂
The new recipe looks great, but the old one was so good! My husband said they were better than the store bought ones! Is there any way that you can keep both recipes on here? I just bought some dates to make these, and I can’t remember how many dates and how much peanut butter goes in them. If you don’t want to put it back up, can you email it to me? Thank you!!
Katrina – If you’d like to email me, I can get you that recipe. 🙂
Katrina did you ever find out how many dates? Would love to make the date version. Thanks