Dutch Oven Chicken Recipe
Do you have a Dutch oven? Dutch ovens make some of the most delicious, tender chicken you’ll ever have, and this Dutch oven chicken recipe is proof!
This dutch oven chicken turns out so moist and tender. When you bake chicken in the oven, it’s easy to overdo it and dry it out. But with a Dutch oven, it’s virtually impossible to dry your chicken out if you do it properly.
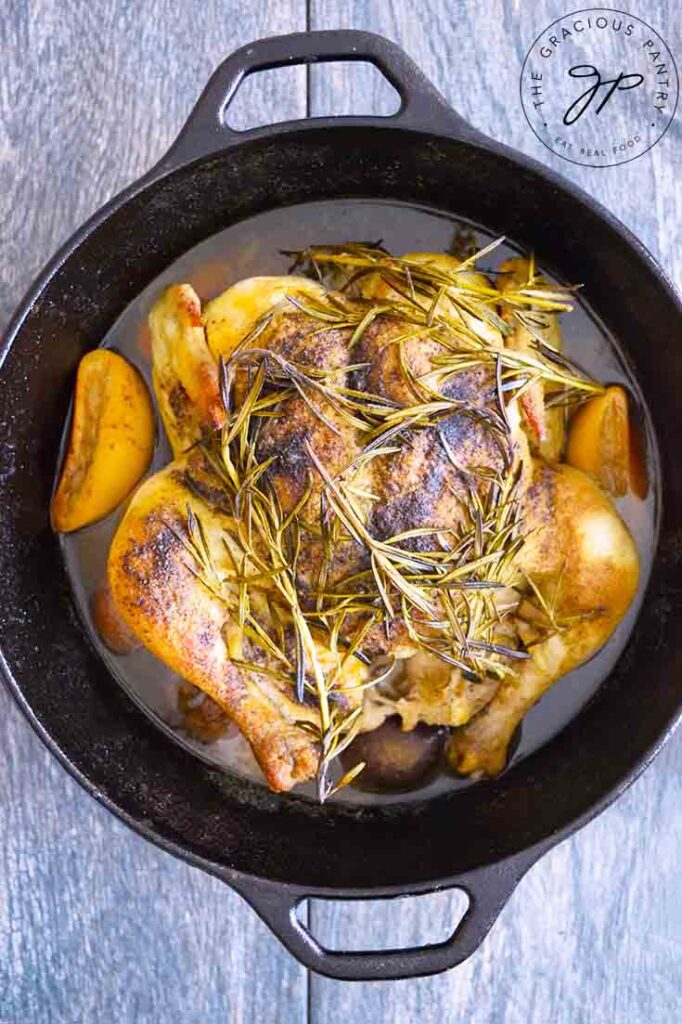
Roast chicken is one of those recipes that can seem complicated at first, but once you do it, you realize just how easy it is. Particularly in a Dutch oven.
What Is A Dutch Oven?
A Dutch oven is a deep, heavy-duty cooking pot that has a tight-fitting lid. It can do many things, from making soups and stews to braising meat or making delicious loaves of bread.
They are quite heavy in weight, but they hold a tremendous amount of heat and steam. So anything you put in them cooks up quite tender and delicious. If you have the storage space, they are a worthwhile piece of kitchen equipment that can be passed down from generation to generation. A good Dutch oven will last for decades.
How To Safely Use A Dutch Oven
It’s no secret that Dutch ovens are heavy. Depending on the pot you get, they can weigh up to 20 pounds! A 5-quart Dutch oven will weigh about 13 pounds on average. The weight can change from brand to brand. But they are supposed to be heavy. So consider what you can lift because you will be adding food to that weight. Cleaning can also be a good bicep workout just from holding up the pot while you wash it.
The second thing to consider is that these pots can build up a considerable amount of very hot steam inside while cooking. I have used silicone handle covers I found on Amazon and ended up with second-degree burns all over my fingers. So you’ll want to be sure you remove the lid safely every single time.
Best suggestion: Use big, thick pot holders. Slide the lid slowly towards you until a bit of steam releases out of the back side of the pot, away from you. Once you know the steam has an escape, you can pretty safely remove the lid the rest of the way. Just make sure you have a heat-safe surface to put it on because it will be just as hot as the pot.
Don’t Have A Dutch Oven?
Don’t worry; this can be done in the oven, too! Simply follow the steps in the recipe as noted. Use a large casserole dish or other baking dish. Oil it first, then add your layers of vegetables, spices, and oils before putting the chicken on top. Then season that with oil and spices and pop it in the oven.
The main difference here is that there is really no need to cook the first 20 minutes at a higher heat. You can pop this in the oven at 350F. and cook for approximately 20 minutes per pound of chicken. So, for a 4-pound chicken, you would cook for approximately 1 hour and 20 minutes, give or take. The important thing is to get it cooked to 165F.
You may also need to place a loose layer of foil over the top at some point if the top of the chicken starts to get too brown. Do not pack the foil tightly. Simply lay it gently over the top of the chicken.
Want A Dutch Oven?
There are two types of Dutch ovens. The bare cast iron Dutch oven and the enamel-coated Dutch oven. In my experience, they cook about the same. One isn’t necessarily better than the other, though I’m sure you could find enthusiasts who would argue that point.
There is a large selection of Dutch oven brands, sizes, and quality on the market.
As with many things in life, you get what you pay for with a Dutch oven.
However, the two brands I recommend, while usually at opposite ends of the price scale, are of exceptional quality. I have the Lodge brand myself, and I love it.
The benefit of getting an enamel-coated Dutch oven is that you don’t have to season it. I can tell you from personal experience that if you don’t season your bare cast iron Dutch oven, it will turn your food black. And theirs nothing quite like trying to serve black chicken. It might work for Halloween, but that’s about as far as it goes.
Is A Dutch Oven Chicken And A Roasted Chicken The Same Thing?
The Dutch oven is the type of pot in which you make a roasted chicken. A Dutch oven chicken is basically a roasted chicken, but the name simply indicates that it was cooked in such a pot.
Dutch oven recipes and Dutch oven cooking are a whole genre of recipes all to themselves, in much the same way as slow cooker recipes or Instant Pot recipes.
How To Cook A Whole Chicken In A Dutch Oven
Veggies – A recipe like this can call for any number of vegetables. I picked what I had on hand: onions, carrots, and potatoes. But you can also use celery, cauliflower, mushrooms, Brussels sprouts, sweet potatoes, tomato halves and more!
It’s important to get the onions on the bottom so they can caramelize a bit. Instead of mixing everything, build layers in the Dutch oven. Season them well and spritz the top with oil.
Chicken – I used a whole chicken for this recipe. But you could also use chicken pieces. I find it best to have some bone, though that’s not a necessity. I just find that the texture is better when there is some bone involved in the cooking process.
You may opt to stuff your roast chicken with aromatics. Things like the used lemon halves in this recipe, garlic cloves, and more onions. But it’s not necessary. At least not with this recipe.
You don’t want to skip spritzing or rubbing your chicken with oil before popping it in the oven. It will need that oil to brown nicely during the first 20 minutes of cooking.
Spices – Once the oil is on the chicken, you can safely add seasonings over the top for extra flavor, and the oil will keep them in place.
About The Ingredients
Oil – Any type you prefer to cook with.
Garlic granules – Or garlic powder.
Himalayan pink salt – Or any salt you prefer to cook with.
Ground black pepper
Ground rosemary
Yellow onions – Peeled, cut in half and sliced thin.
Baby carrots
Baby potatoes Fingerling potatoes work well.
Whole chicken
Lemon
Fresh rosemary sprigs – Optional, but great flavor. Here is a great article on drying your own rosemary if you prefer dried to fresh.
How To Make Dutch Oven Chicken
- Preheat oven to 450F. Spread the oil in the bottom of your Dutch oven. If you use an oil sprayer, spray the sides as well.
- Place the onions in the bottom of the Dutch oven and spread them out to cover the bottom.
- Add baby carrots over the onions.
- Spritz the veggies with oil and sprinkle the vegetable seasonings over the carrots and onions.
- Add the potatoes on top.
- Place the whole chicken over the potatoes.
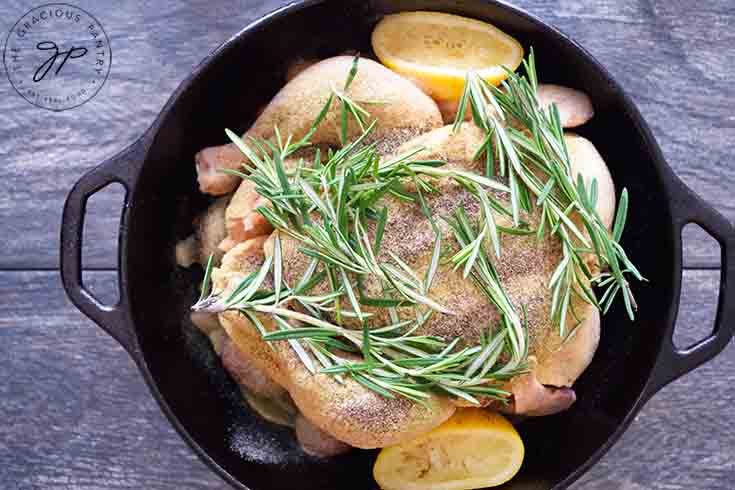
- Squeeze the lemon by hand over the chicken (try to pick out any seeds before squeezing), and place the squeezed lemon halves in the pot next to the chicken.
- Spritz the chicken with oil.
- Sprinkle the seasoning over the chicken.
- Place the rosemary sprigs on top of the chicken if using. Place the Dutch oven in the preheated oven WITHOUT its lid, and cook for 20 minutes.
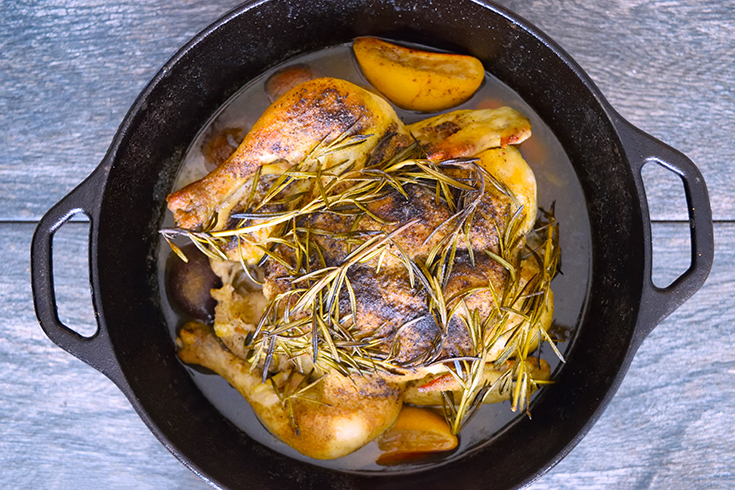
- Remove the pot from the oven and place the lid on the Dutch oven. If the bottom of the Dutch oven seems dried out, you can add a bit more oil or even chicken broth. Just enough to keep the bottom from drying out. Reduce the oven heat to 350F. and place the Dutch oven back into the oven. Cook for approximately 1 hour 10 minutes (or until the chicken reaches at least 165F. on a meat thermometer)
- Remove the Dutch oven from the oven and carefully remove the lid. There will be steam, so slide the lid towards you first so the steam can escape out the back instead of burning you. (personal experience talking!) Serve with the veggies and maybe a side of rice!
More Whole Chicken Recipes

Dutch Oven Chicken
CLICK TO WATCH THIS RECIPE IN ACTION!
Equipment
- Dutch Oven
Ingredients
Vegetables
- 1 tbsp. oil
- 1 tbsp. garlic powder
- ½ tsp. Himalayan pink salt
- ½ tsp. ground black pepper
- 2 medium yellow onions (peeled, cut in half and sliced thin)
- ½ lb. baby carrots
- 1 lb. baby potatoes (fingerling potatoes work too)
Chicken
- 4 lb. whole chicken
- 1 medium lemon
- 1 tbsp. oil
- 1 tbsp. garlic powder
- ½ tsp. ground rosemary
- ½ tsp. salt
- ½ tsp. ground black pepper
- 4 sprigs fresh rosemary (optional, but great flavor!)
Instructions
- Preheat oven to 450F. Spread the oil in the bottom of your Dutch oven. If you use an oil sprayer, spray the sides as well.

- Place the onions in the bottom of the Dutch oven and spread them out to cover the bottom.

- Add baby carrots over the onions.

- Spritz the veggies with oil and sprinkle the vegetable seasonings over the carrots and onions.

- Add the potatoes on top.

- Place the whole chicken over the potatoes.

- Squeeze the lemon by hand over the chicken (try to pick out any seeds before squeezing), and place the squeezed lemon halves in the pot next to the chicken.

- Spritz the chicken with oil.

- Sprinkle the seasoning over the chicken.

- Place the rosemary sprigs on top of the chicken if using. Place the Dutch oven in the preheated oven WITHOUT its lid, and cook for 20 minutes.

- Remove the pot from the oven and place the lid on the Dutch oven. If the bottom of the Dutch oven seems dried out, you can add a bit more oil or even chicken broth. Just enough to keep the bottom from drying out.Reduce the oven heat to 350F. and place the Dutch oven back into the oven.Cook for approximately 1 hour 10 minutes (or until the chicken reaches at least 165F. on a meat thermometer)

- Remove the Dutch oven from the oven and carefully remove the lid. There will be steam, so slide the lid towards you first so the steam can escape out the back instead of burning you. (personal experience talking!) Serve with the veggies and maybe a side of rice!

Notes
Nutrition
Recipe from the Gracious Pantry archives, originally posted 1/10/13.














I want to switch from nonstick to cast iron but i am really unsure how well it will work for clean eating. What are your thoughts?
I love cast iron. It’s all I cook with. 🙂
Thank for this recipe, it appears to be paleo too!
This looks yummy — I plan to try it this weekend. The recipe calls for cashews, but that looks like walnuts in the photo. Am I seeing wrong?
It’s cashews.
You could try it, but the slow cooker is a much wetter environment. It may not turn out the same.
Oh this sounds yummy! making tonight!!!!
I made this recently and it turned out SO DELICIOUS. My only changes for the next time I make it, that’s different than the recipes calls for, would be to mix the spices together beforehand and then spread them over the chicken. My husband and I got a quite a few bites of mainly cinnamon or a lot of cumin…still delicious, but the blending of the spices would be better! And, my chicken breasts were pretty thick, so they could’ve used more flavor on the thicker end of the chicken. I would simply pound the breasts out thinner so they would be more coated in the yummy seasoning blend! THANK YOU for this recipe…it was a family pleaser, for sure!!
This sounds wonderful! I don’t have a dutch oven…would you have a equivalent for a regular oven? Thank you.
Not for this one. But I have lots of other chicken recipes here. 🙂
I am trying to cook healthy for my family and am so excited to have found your website. We are all kind of picky eaters. I have 3 boys and they love anything that comes in a package and turn their noses up at most things that are healthy. This is the first receipe that I’m going to try and then the alfredo sauce. Thank you for providing all this wonderful information.
Emmy – My pleasure! But I’m not sure this is a recipe you want to start your kids on. I have a kids section, you might be better off starting with one of those. This one would be more of an acquired taste for kids.
I made this tonight and it was a huge success! Everyone liked it! I had to change a few things as I thought I had all the ingredients, but I didn’t. Oh well! My boys (age 7&9) liked it too! Thank you for the recipe! It was my first ever experience with cast iron and our new Dutch oven! I will be making this again! Very easy!!!
Jessica – How wonderful! I’m so glad you all enjoyed it!
Silly question: do you keep the lid on the dutch oven when it goes in your oven? I’ve seen recipes that do both…
Nicole – I did, yes. 🙂
For the Clean Eating Dutch Oven Chicken you don’t mention whether or not to leave the pot lid off or on during oven cooking. Small but important detail. Some recipes want the lid on and others off, so I guess I have a 50-50 shot of guessing right.
I’m trying this recipe now with the lib ON and hope I chose wisely, or we’re ordering out tonight….
Thanks, looking forward to trying this in a few minutes!
Marie – Yes! You chose correctly! 🙂
Quick question. I want to make this recipe tonight but I don’t have the cashews on hand. Do you think pecans would turn out okay? Maybe I’ll just try and let you know! Haha
Jessica – Probably. I don’t see it being too big of an issue. Let me know how it goes!
The recipe was great. The chicken was moist and all the veggies were perfectly cooked. My first time cooking chicken in my lodge cast iron dutch oven. I will definitely make it again. Thank you.
Andrea – Fantastic! I’m so happy you enjoyed it! Thanks so much for the feedback. 😀 I love my cast iron dutch oven. I make whole chickens in it all the time. They always turn out delicious!