
Homemade Roasted Garlic Vinaigrette Recipe
This post may contain affiliate links. If you make a purchase through links on this site, I may earn a commission.
Read my Privacy Policy.
If you love a good, homemade salad dressing like I do, give this roasted garlic vinaigrette a try. It’s a versatile dressing that has many uses. Read on to find out more!
Is Roasted Garlic Healthy?
Absolutely! How you cook garlic has no barring on whether it’s healthy or not.
Garlic itself has been attributed with many wonderful health attributes. Among them are a nice boost to your immunity, it works as an anti-inflammatory, and even helps to improve cardiovascular health.
Garlic will have these benefits whether it’s raw, roasted, or cooked into stew.
How To Store Roasted Garlic
To store roasted garlic, you have two options.
- Place the garlic cloves in a small container with a tight fitting lid. Cover with oil and keep in the fridge for up to 2 weeks.
- Freeze them without oil. You can either mash them and freeze the mash in ice cube trays, or you can freeze the individual cloves on a sheet pan, and then combine them in a freezer-safe container once frozen.
How to Roast Garlic – Six Different Ways

Air Fryer Roasted Garlic
This is how I roast my garlic. It’s faster and doesn’t use a ton of gas or electricity like heating up and oven. Simply follow the recipe all the way up to wrapping it in foil. Then, instead of placing it in an oven, place it in an air fryer at 380 F. 16-20 minutes. Easy! Note, that cooking times can vary from appliance to appliance.

Wilton Recipe Right Nonstick 12-Cup Regular Muffin Pan (2, STANDARD)
Muffin Pan Roasted Garlic
You can make multiple heads of roasted garlic at once by using a muffin pan. Simply place a head of garlic in each well. You can either top with another, upside down muffin pan, or you can loosely wrap the muffin pan with a sheet of foil. Then bake at 400 F. for 30-40 minutes.

USA Pan Bakeware Aluminized Steel Loaf Pan, 1 Pound, Silver
Loaf Pan Roasted Garlic
Here again, you can roast multiple heads of garlic by simply preparing them and placing them in a loaf pan. Cover the loaf pan with foil and back at 400 F. for 30-40 minutes.

Norpro Garlic Baker
Ceramic Or Cast Iron Garlic Roaster Roasted Garlic
These garlic roasters are handy if you tend to roast a lot of garlic. They aren’t essential, but if you roast garlic regularly, they are nice to have on hand. They also come in cast iron which allows you to use them easily on a grill. There are many different styles to choose from.
Foil Packet Roasted Garlic
You can wrap a head of garlic in foil, without putting it into a small dish, then place it in the oven. You can also roasted multiple heads of garlic in one foil packet.
Parchment Packet Roasted Garlic
If you don’t want to use foil, you have two options.
- Wrap each individual head or a few heads in parchment for roasting.
- Lay parchment on a baking pan (obviously not a packet), and separate the garlic cloves. Spritz them with oil using an oil sprayer and roast as usual. You’ll have to cut the tip off each clove to remove them.
What You’ll Need
1 medium garlic head – This amount will give you a mild, pleasant, garlic flavor. You may use up to 3 heads of garlic for stronger flavor.
½ cup white balsamic vinegar – If you don’t have this, you can use regular balsamic vinegar. However, the color of the final dressing will be red instead. The flavor will be comparable.
½ cup oil – Use anything light in flavor such as grapeseed or safflower oil. Use whatever oil you consider to be healthiest.
½ tsp. prepared yellow mustard – Make sure there is no added sugar. Many mustard brands do add processed sugar.
1½ tbsp. maple syrup – As with the garlic, this ingredient is adjustable to taste. You can start with 1 tbsp. and adjust up as you like. It’s easy to blend in more as you like.
¼ tsp. salt – I used pink Himalayan salt. You should use whatever salt you normally use in the kitchen for cooking.
How To Make Homemade Roasted Garlic Vinaigrette Dressing
You’ll need to roaster your garlic first. Thankfully, this is a very easy process. Select which option works best for you from the list above. Then proceed.
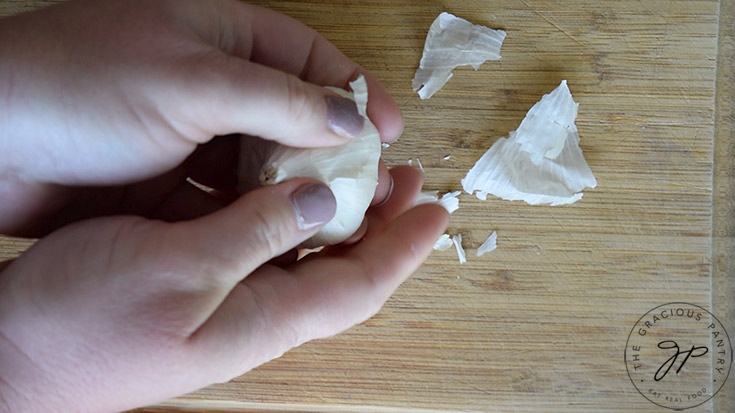
Preparing the Garlic Head for Roasting
Rub the excess skins off the outside of the garlic head, using your fingers. You want to remove enough skin to expose the outer cloves without removing the cloves from the head.
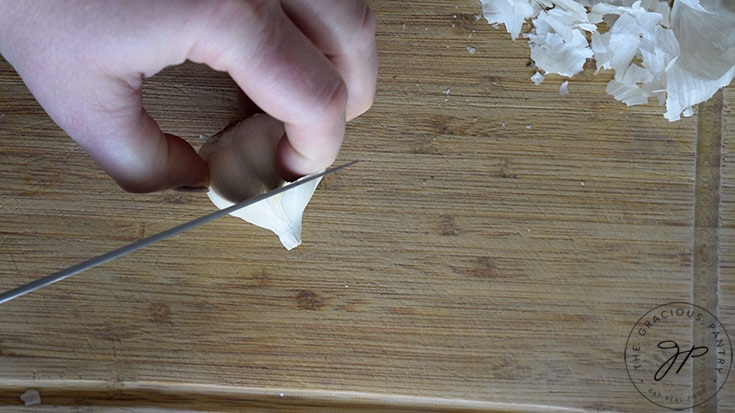
Cutting The Garlic
Cut approximately ½ to ¾ of an inch off the top tip of the garlic. The amount you cut off will depend on the shape of your bulb. You want to expose as many of the cloves as possible without removing too much of the larger garlic cloves. Use your judgement here.
If a few of the outermost cloves do not get cut, that’s okay. But you want the majority of them exposed.
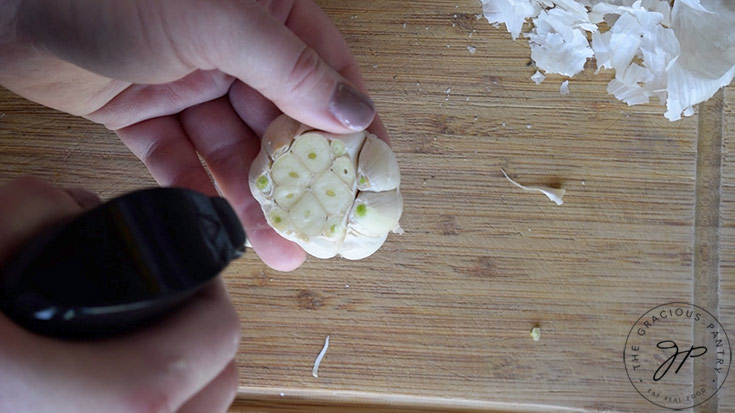
Oiling The Cut Garlic
Once the garlic is cut, you’ll want to coat the exposed garlic with a bit of oil. This will help it caramelize nicely in the oven.
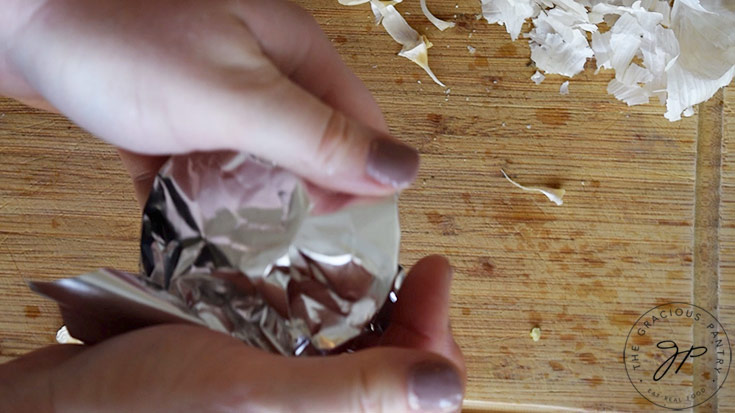
Wrapping The Head Of Garlic
I placed my head of garlic in a small tart pan and then wrapped the entire thing with foil. You can also use parchment, or one of the above mentioned methods.
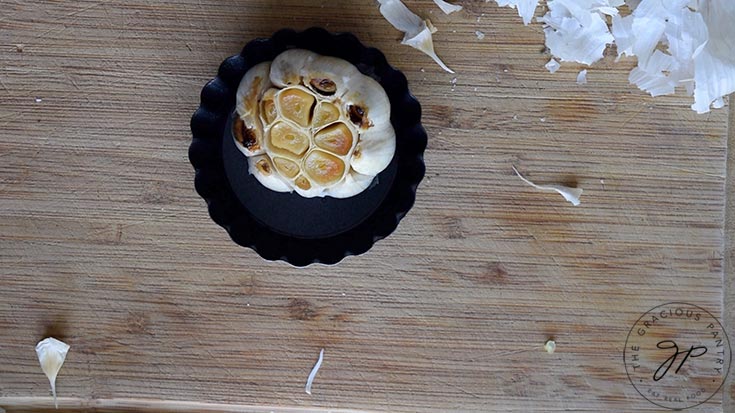
Roasting Garlic
Roast the garlic at 400 F. for 30-40 minutes. There should be some caramelized edges when it’s done, and in some cases, a clove or two will pop up during roasting, if it has the room to in the foil wrap.
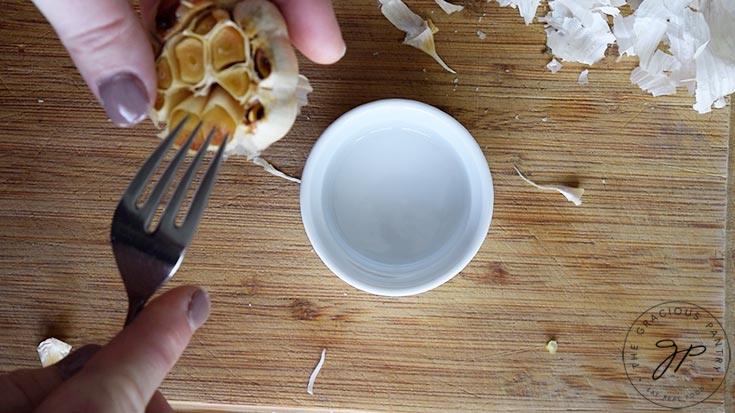
Removing the Roasted Garlic Cloves
It’s tempting to just squeeze the garlic out. But take it from me, you’ll lose half your garlic doing that. Instead, use a fork or a toothpick, and quickly pick out the exposed cloves. If they are properly roasted, they will pop out easily enough.
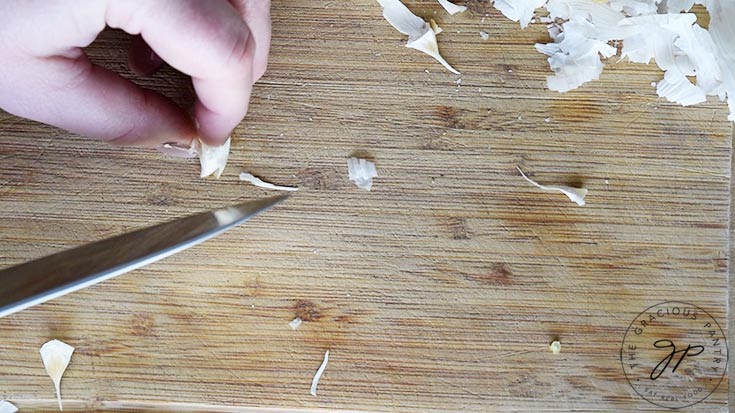
What About Uncut Cloves?
Simply cut the tip off, cut or rip one side of the skin, and then easily extract the garlic clove inside.
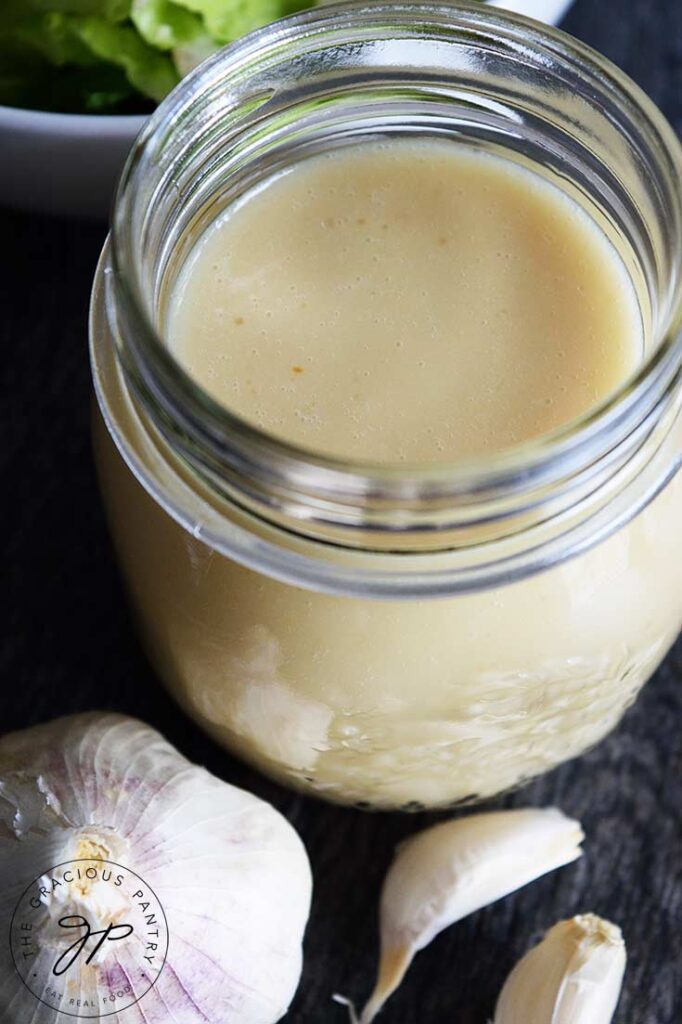
Make Roasted Garlic Vinaigrette At Home
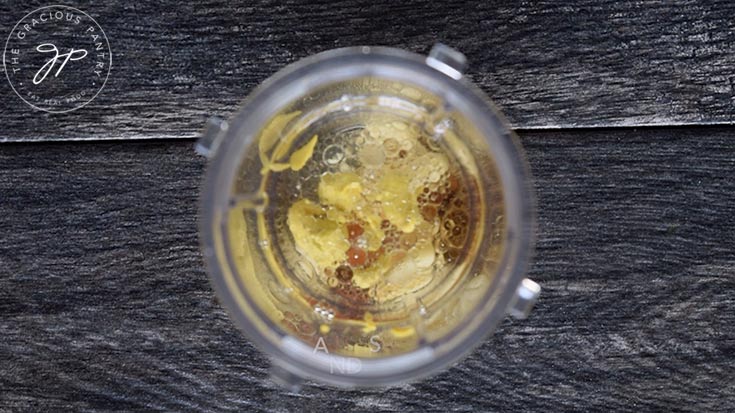
For making the dressing, you’ll simply place all the ingredients in a blender.
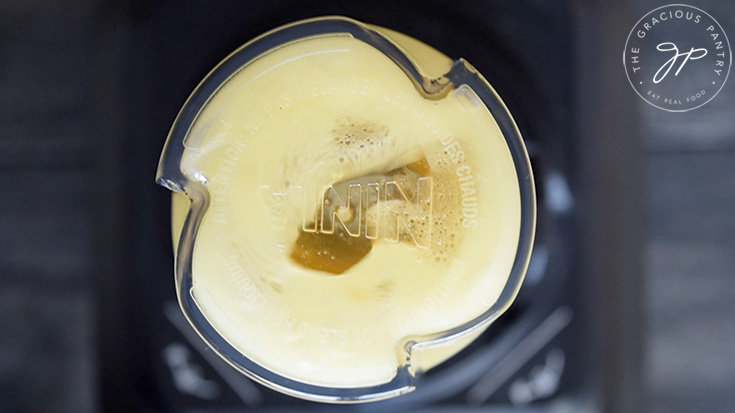
Blend well. This can take a full minute or too to get it nice and creamy and smooth.

How To Use Roasted Garlic Vinaigrette
- Green salads
- Other vegetable salads
- Use in place of butter on steamed veggies (yum!!!)
- Over beans or as a bean salad dressing
- As dipping sauce for bread or pizza
- As a dressing for pasta salad
- Use it to marinate chicken, or simply pour some over plain chicken as a sauce
- This is particularly good over roasted Brussels sprouts!
SUBSCRIBE
Remember to subscribe to my free newsletter to receive all my latest recipes in your inbox. Click here to sign up!
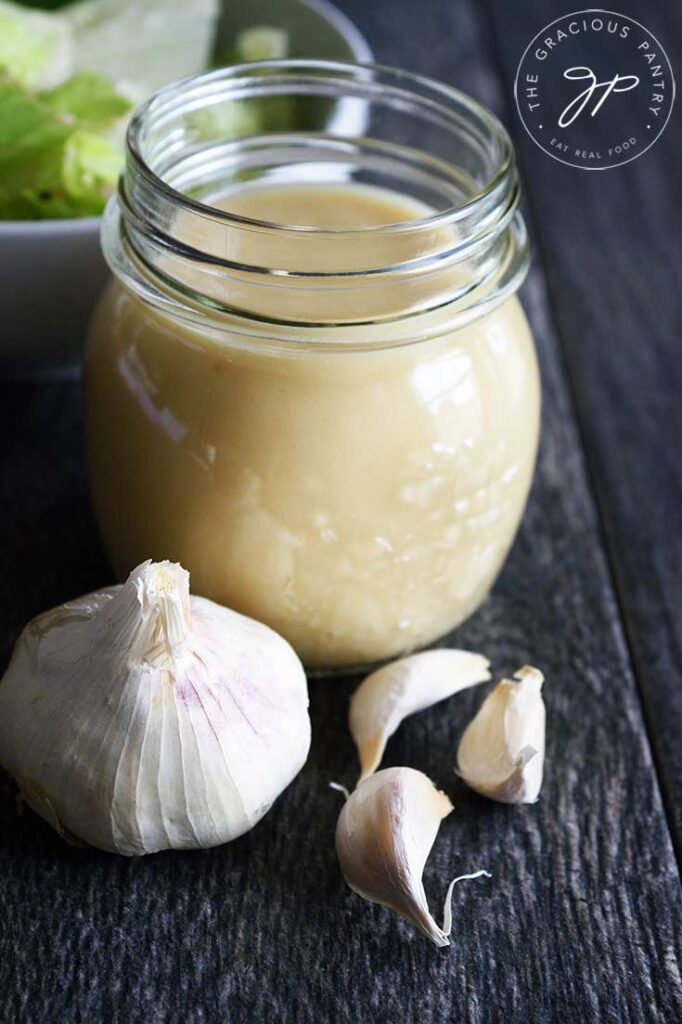
Roasted Garlic Vinaigrette Recipe

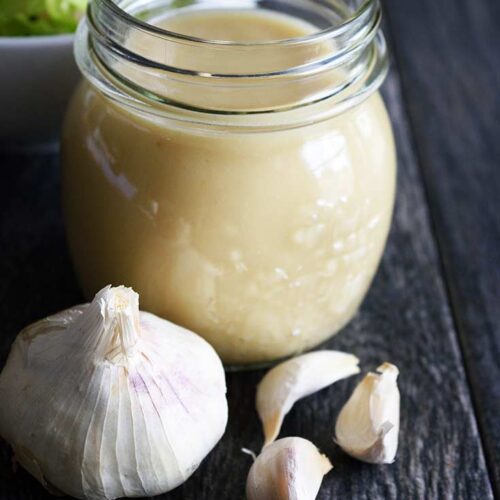
Roasted Garlic Vinaigrette Recipe
CLICK TO WATCH THIS RECIPE IN ACTION!
Equipment
- Blender
Ingredients
- 1 medium garlic head (use up to 3 heads of garlic for stronger flavor)
- ½ cup white balsamic vinegar
- ½ cup oil (anything light in flavor)
- ½ tsp. prepared yellow mustard
- 1½ tbsp. maple syrup (you can start with 1 tbsp. and adjust up to taste)
- ¼ tsp. salt
Instructions
- Blend well and serve.


Such a great, simple, and delicious salad dressing! Making a healthier homemade dressing had been a goal of mine for awhile and this was the first one I tried, love it!! I love the creaminess, the vinaigrette tangy flavor. For heavier meals I opt for a vinaigrette and this one knocks all others out of the park!🏸 I followed the recipe exactly and used honey and 1 head of roasted garlic. Amazing! Going to print it for my recipe book to use for our daily salads.
Gabriela – I’m so happy you love it! Thanks so much for the feedback! 😀