
Chicken Vegetable Kabobs Recipe
This post may contain affiliate links. If you make a purchase through links on this site, I may earn a commission.
Read my Privacy Policy.
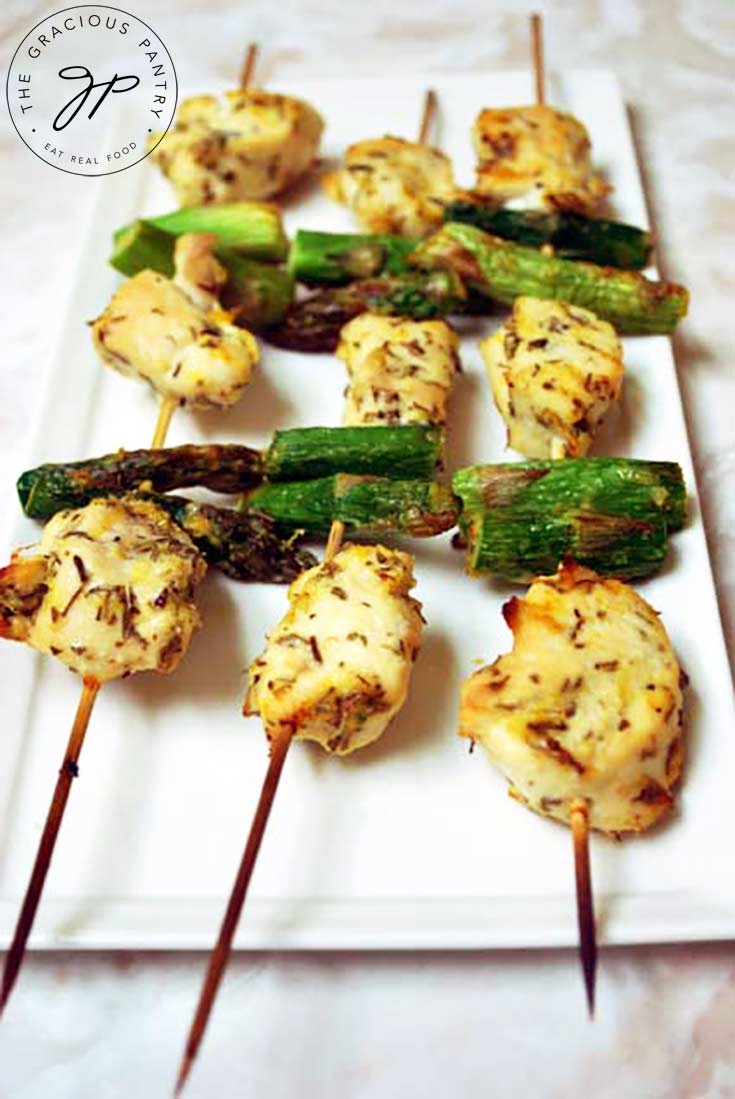
These chicken kabobs are a fun addition to any dinner!
At the risk of sounding really arrogant, I’ve TOOOOOTALLY outdone myself with this one (Did you hear that California accent ….. dude?). I mean, these turned out REALLY good! I’ve been wanting to make these for a while and finally knuckled down and made them.
The only thing I would change next time is, I would use ground savory instead of the dried leaves. I think it would be a better texture.
And just a note: metal skewers are much simpler to work with. While I used wooden skewers, I don’t recommend them unless you have a specific reason for using them.
Chicken Kebabs – Vegetables And Other Additions
- Mushrooms
- Red bell peppers
- Red peppers
- Green pepper
- Zucchini
- Yellow squash
- Garlic cloves
- Chunks of onion
- Pineapple
What Other Spices Can Be Used?
Any dried herbs should be ground to better coat the chicken and veggies.
- Thyme
- Oregano
- Ginger – make sure you pair this with the proper veggies or it won’t taste good.
- Basil
- Rosemary
Can You Use A Marinade Instead?
You can! Try a chicken marinade or keep it simple by using soy sauce or coconut aminos.
Can I Cook These On A Grill?
Whether you use a gas grill or a charcoal grill, these will cook on a barbecue just fine. However, you may want to cut the chunks a bit larger so they hold up on the grill.
About The Ingredients
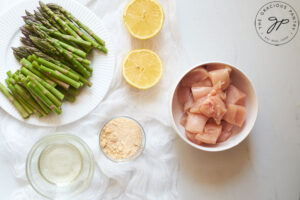
Boneless, skinless chicken breasts – You can also use chicken thighs if you prefer them.
Asparagus – cut into 1 or 1½ inch pieces.
Ground savory – or ground thyme.
Garlic granules – or garlic powder.
Onion granules – or onion powder.
Lemon zest – the amount from approximately 1 lemon.
Lemon juice – the amount from approximately 1 lemon.
Olive oil – or any light-flavored oil.
How To Make Chicken Vegetalbe Kabobs
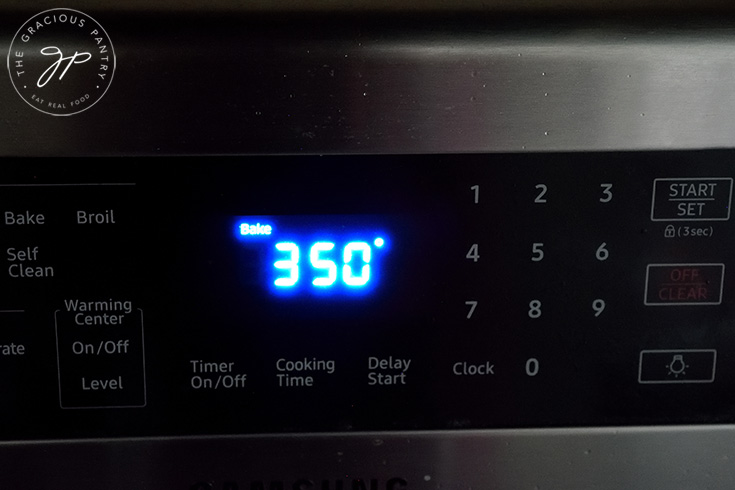
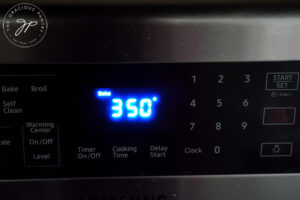
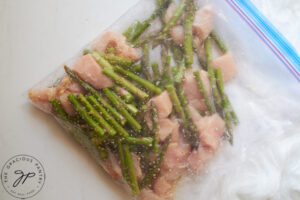
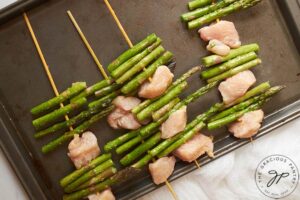
Preheat the oven to 350 degrees F., and place your kebob sticks in a pan of water to soak if you are using wooden skewers (You do this so they won’t catch fire in the oven). Metal skewers will save you this step.

Chop your chicken and asparagus or any other veggies into 1 or 1½-inch pieces.

Place all ingredients in a ziplock back, and moosh it around (yes,”moosh” is a very technical word. So moosh darn it… MOOSH!!! – Sorry, I can get a little bossy sometimes. Ignore me. But you still gotta moosh).
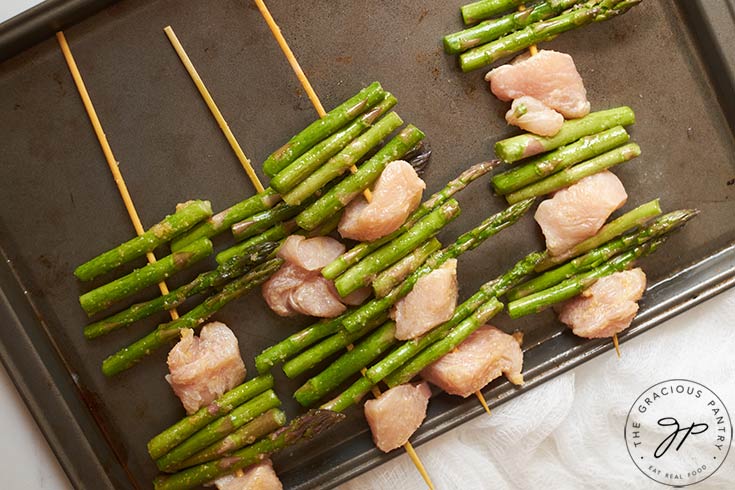
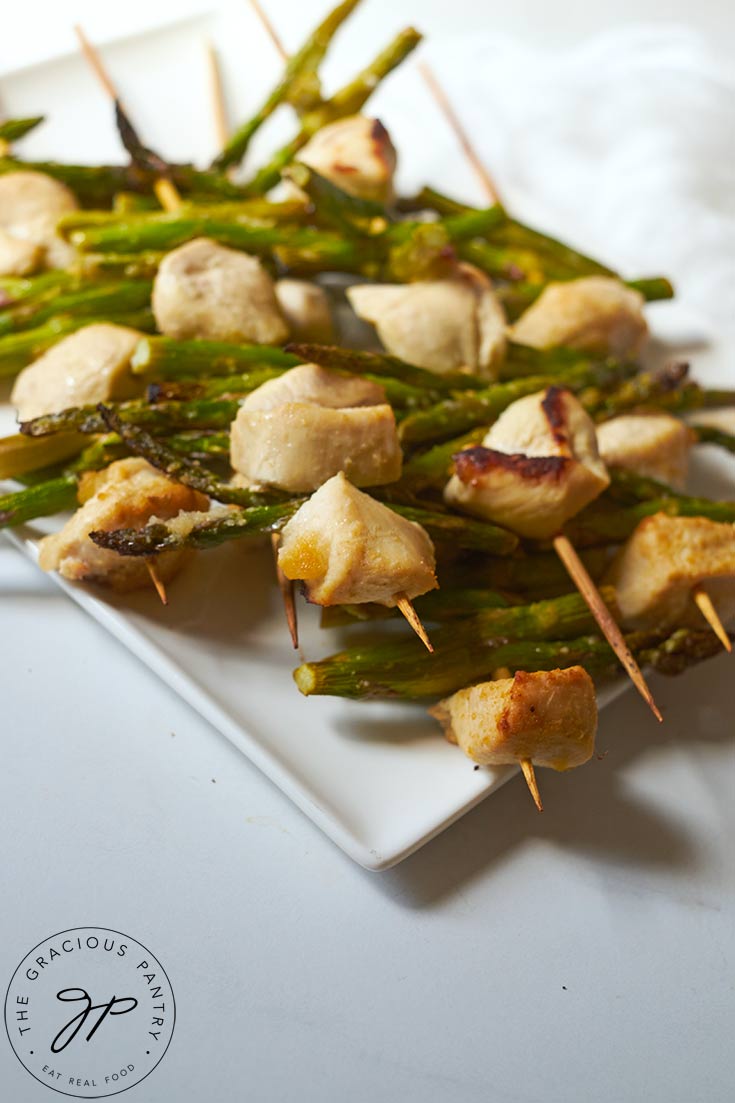
Alternate placing your asparagus and chicken on your kebob sticks and lay them on a sheet pan.
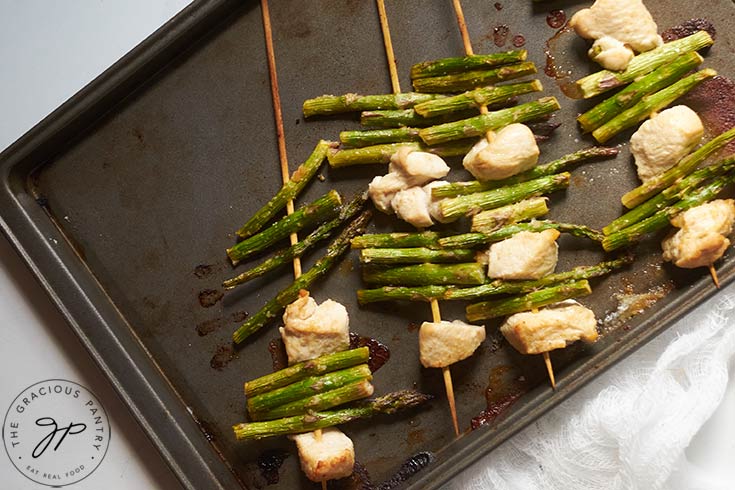
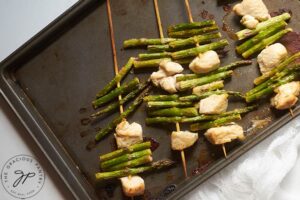
Bake for 10 minutes, flip the kabobs, and switch the oven to broil for another 10 to 15 minutes. Once the chicken is browned and reads at least 165 F. on a meat thermometer, the kabobs are done.
How To Store Chicken Vegetable Kabobs
Remove the skewers and store the chicken and veggies in an airtight container in the fridge for up to 3 days.
More Healthy Chicken Recipes

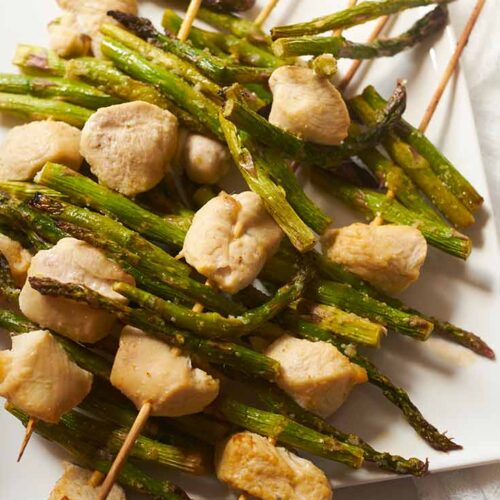
Chicken Kabobs
Equipment
- Skewers
Ingredients
- 32 oz. boneless, skinless chicken breasts
- ½ lb. asparagus (cut into 1 or 1½ inch pieces)
- 2 tsp. ground savory
- 1 tsp. garlic powder
- 1 tsp. onion powder
- 1 tbsp. lemon zest
- 1 tsp. lemon juice
- 2 tsp. olive oil
Instructions
- Preheat the oven to 350 degrees F., and place your kebob sticks in a pan of water to soak if you are using wooden skewers (You do this so they won't catch fire in the oven). Metal skewers will save you this step.

- Chop your chicken and asparagus or any other veggies into 1 or 1½-inch pieces.
- Place all ingredients in a ziplock back, and moosh it around (yes,”moosh” is a very technical word. So moosh darn it… MOOSH!!! – Sorry, I can get a little bossy sometimes. Ignore me. But you still gotta moosh).
- Alternate placing your asparagus and chicken on your kebob sticks and lay them on a sheet pan.
- Bake for 10 minutes, flip the kabobs and switch the oven to broil for another 10 to 15 minutes. Once the chicken is browned and reads at least 165 F. on a meat thermometer, the kabobs are done.
Notes
Nutrition

Looks really good. I will be trying this one! 🙂
Let me know how you like them!
I just made these tonight and they were delicious! I substituted thyme and a little sage for the savory. Yum!
Fantastic! Glad you like them Anne!
beautiful! and looks delish, looking forward to adding this to my menu this week.
What a great website~thanks to LDSmomma for sharing your blog, it’s great!
Thanks Jennifer! I hope you enjoy them!
Hi,
You mentioned oil and said there’s not a lot in this recipe, but I didn’t find any mention of using oil anywhere?
Arlene – Thanks for pointing that out! The recipe has been updated.
Debi – Oh dear! Watch out for those skewers! They’ll getcha’! But glad you enjoyed it. 🙂
Sure!
Haha!!! Well, I don’t really give Mini Chef a choice. He has to take one “thank you bite” of everything I make. It opens up his taste buds without forcing him to eat something he honestly doesn’t like. I hope he enjoyed the asparagus. Just warn him about the “after effects”. Ha!
That would be the savory. But I recommend using powdered savory instead. The texture of the whole herb wasn’t as nice as the powdered would be.
Is this 8 ounce total of chicken or 4 breasts of chicken that are 8 ounces each?
thanks!
Logan – 8 ounces each
This looks delicious and I can’t wait to make them 🙂 I don’t have parchment paper on hand; can I use foil instead? Or oil the pan to keep them from sticking? Thanks!
Brittany – Yup! Either way should work.
My husband soaks our wooden kabob sticks before using them. Prevents splinters.
Sandy – I soaked mine too, but somehow I still ended up with splinters. I stick to metal ones now.
I don’t have metal kabob sticks and I don’t feel like splinters…could I just lay the chicken & asparagus on the parchments paper and stir them around periodically during cook time (instead of flipping)??
Kaitlyn – Definitely! 🙂
Way too much lemon zest! Chicken was too lemony, and I couldn’t eat very much. If I make this again, I will use maybe a teaspoon of lemon zest. Also, I couldn’t taste the other spices much and would use more if I made this again.
Chelsea – I’m sorry you didn’t care for it. 🙁